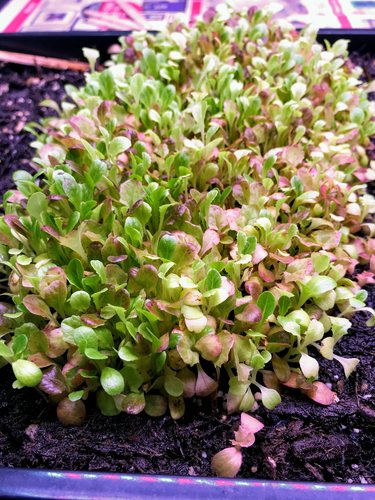
Even if you think you have no idea what a microgreen is, you probably do. If the image below looks similar to what you’ve eaten or seen at restaurants, then now you know the little greens on the plate are the MICROGREENS.

Photo Credit: Taylor Cleland/Dorjee Momo (@dorjeemomo)
Let’s break it down and talk about microgreens.
Table of Contents
What are Microgreens?
To put it simply, microgreens are itty-bitty, tiny edible greens from seeds of vegetables and herbs.
The USDA said, “In general, microgreens contained considerably higher levels of vitamins and carotenoids—about five times greater—than their mature plant counterparts.”
Microgreens contain about 5X more nutrients than their mature plant counterparts.
USDA AgResearch Magazine
They are smaller than baby greens and larger than sprouts. They germinate and grow very quickly, in as little as 7 days. That’s only a week, folks!
According to research conducted by the Agricultural Research Service of the USDA, mice who were fed red cabbage microgreens were able to moderate their weight and cholesterol levels even when eating a high-fat diet.
You read that right, this study comes from the U.S. Department of Agriculture, so this is science and you should believe it and eat your microgreens.
What You Need To Know Before Growing Microgreens
We probably read over a dozen articles and watched over 20 YouTube videos on growing microgreens before taking any action.
Follow the simple instructions below and get started.
It takes a few days for microgreens to germinate, so at the very least, you’ll know you’re on the right track.
Choose a Container to Grow Your Microgreens
Find any container that is at least one inch deep.
- a plastic container (plastic can leach into the soil and get into our food, so make sure to use food-grade plastics with a number 1, 2, 4, or 5 on it)
- an old peanut butter, jelly, or other condiment jar
- a glass bowl from your kitchen cabinet
- a plant pot
What did we use?
1020 trays like these here.
Choose Your Seeds
You don’t have to buy special seeds to grow microgreens.
Shop at your local nursery or online at Johnny’s or High Mowing, which sell a variety of organic seeds.
Pick what you want to grow. Don’t know where to start?
Check out this list from Bootstrap Farmer with a list of the easiest microgreens to grow.
Here’s a chart from Johnny’s Selected Seeds for how much you’ll grow per tray for 29 different microgreen varieties.
What did we pick?
Here’s what we started growing first because of the short days to harvest on the packages.
| Seed | Days to Harvest | Description | |||
| Pea Shoots | 7-14 | These are the bigger cousins of microgreens; Crunchy, tastes like peas; harvest when 2-4″ tall; they taste woody (hard to chew) if you grow them taller and wait to harvest | |||
| Cilantro | 5-14 | Tastes just like cilantro! Harvest when leaves open and 1-3 inches tall | |||
| Broccoli | 10-15 | White stems with dark green leaves; tastes like mature broccoli | |||
| Mizuna | 21 baby/ 40 full | Asian green, peppery flavor | |||
| Encore Lettuce Mix | 28 | Combo of green oakleaf, red oakleaf, green romaine, red romaine, lollo rossa, red leaf, and bibb lettuces |
Choose Your Soil Medium
You could use coconut coir or hemp mats.
What did we use?
We chose potting mix because it’s easy to find and seemed foolproof.
Potting mix should be organic, labeled with OMRI and/or CDFA certifications. These certifications ensure substances and materials used in the production or handling of organic agricultural products by farmers and processors are suitable for organic food production.
Choose Your Sunlight
You can grow microgreens indoors if you have a south-facing window (not too drafty) that produces enough light.
We used a DIY grow light system to grow my first batch of microgreens.
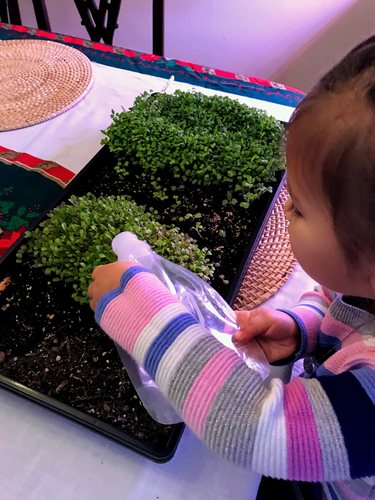
Instructions for Growing Microgreens Indoors with Kids
Prepare Your Tray or Container
- Bottom Water the tray or container: We used two cups for our tray
- Add potting mix to the tray leaving 1/2″ free at the top of the tray; doing this will allow you to cut your greens without getting soil caught in them
- Use another tray or container to compact the soil down and smooth out the soil
Sow Your Seeds
- Transfer seeds from the seed packet to a shot glass or other small container
- Allow child to lightly distribute seeds and scatter across the tray (in our case my daughter just dumped the seeds in one place, so we spread the seeds out by hand; this is another good reason to use a cup to transfer seeds, so that you don’t dump the whole seed packet in)
- (Optional) Pre-Soaking Seeds: some packets recommend soaking beforehand but I didn’t this first go. Soaking speeds up the germination process by getting water in them first. Simply soak seeds in a bowl, cover with water, and let sit per the recommended time.
Water
- Try to get the seeds to germinate by lightly misting water over the tray
- You may need to help your child use the mister since it requires some pressure
- Watering like this also helps the seeds to stick to the soil
Cover The Tray Or Container
Most seeds need darkness to germinate, so cover your tray or container with something else.
Blocking out light for a few days will allow the seeds to germinate. You’ll see them start to sprout and lift up.
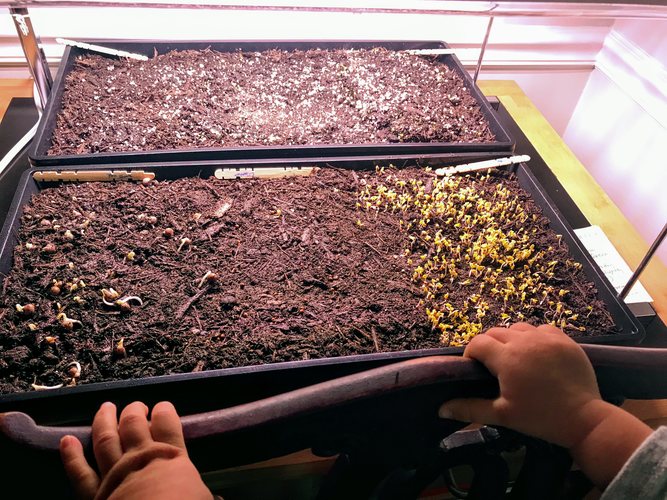
Daily Maintenance
- The fun begins!
- Check the tray or container daily to see what’s happening
- Keep your tray where you’ll see them every day as a reminder to monitor them
- Check for mold and if you see any spray with grapefruit seed extract where you see it
- Your microgreens may grow tiny white hairs that resemble mold. They form part of the roots to help take in as much water as plants need. To test if it’s mold: spray the plants with water and if the white hairs disappear, it’s not mold.
- Spray lightly across the tray especially if the tray feels super light.
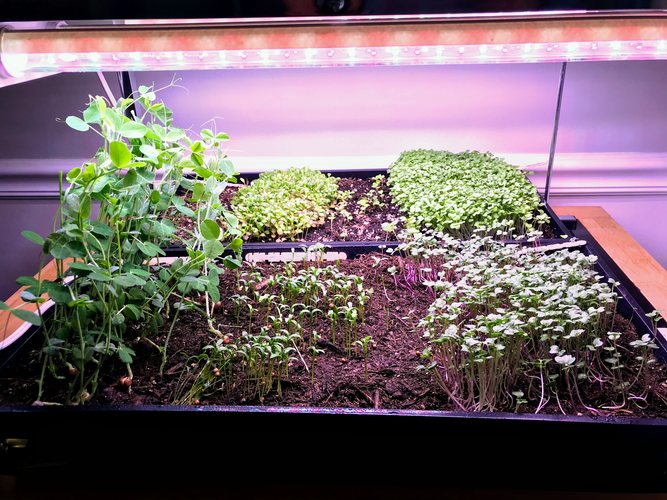
Bring On the Light
- After germination, expose your tray or container to light from your windowsill or from a grow light.
- LED Grow lights are efficient
- Plants will take in light now and begin photosynthesizing. This will take your plants from white/yellow in color to lush green.
Harvest Time!
- When your plants are ready to harvest, give them a nice cut across the bottom with sharp and clean scissors, whatever you have handy
- Rinse with water, or in our case, we just cut and skipped over rinsing since they didn’t touch the soil
- Add to your dishes
- Save for later in a tea towel and place in your crisper for 3-5 days

Pea Shoots, Cilantro, Broccoli Mizuna Encore Lettuce Mix
We would eat the pea shoots right from the tray. We waited a week too long probably before harvesting a bunch of pea shoots and they got really woody.
The cilantro microgreens took longer to germinate than the broccoli and pea shoots. We had uncovered the whole tray, but if we kept that one area dark, they likely would have germinated faster and seen more growth.
The broccoli microgreens were delicious and easily added to homemade pizzas and pastas.
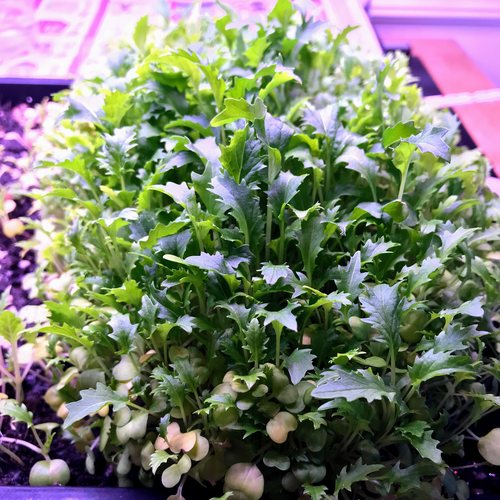
As for the mizuna and the encore lettuce mix. We let both grow until they were baby greens.
The encore lettuce didn’t grow as large as they should have been in that timeframe because they needed deeper soil. Next time we’ll use pots to grow the lettuce.
Compost the Soil After Harvesting Microgreens
Now that you’ve harvested your greens, what do you do with the leftover soil.
The soil has a ton of roots all over the place, so it’s best to go ahead and compost it for another day.
Here are steps for composting this soil.
What Are Microgreens In Our Daily Meals?
You can add microgreens to just about anything.
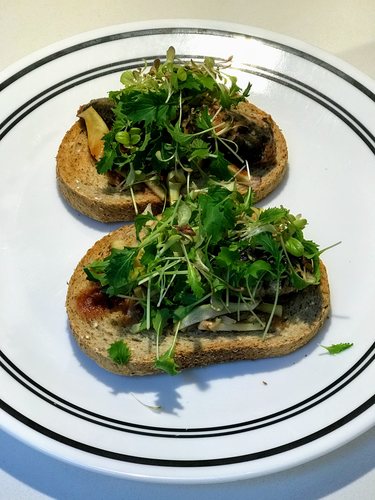
If you love sardines in tomato sauce as much as we do, then you’ll love what we did with mizuna and the encore lettuce.
We took two toasted pieces of wheat bread, added a layer of sardines in tomato sauce on top, and then covered them with mizuna and encore lettuce.
Our two year old even liked it, deconstructed, of course.
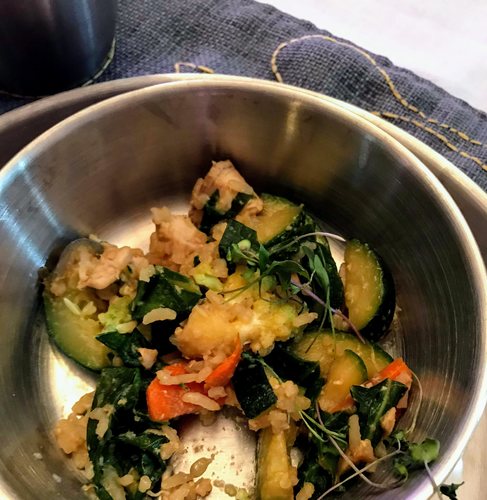
The other image below is a toddler rice bowl with carrots and zucchini. We added the broccoli and cilantro microgreens to this. We didn’t think to snap a pic until our daughter had eaten half of the bowl.
Let’s be real. There’s no glamorous food photographer in this house, so a lot of our images will be as-is, not photoshopped or staged. That’s just life.
And no, our daughter does NOT eat out of doggy bowls (although these do look similar). These are shatterproof metal bowls by Caveman Cups. You’ll see the plate underneath. They’re practical. Go buy them. Don’t judge.
Mizuna and Encore Lettuce On Top of Sardine Tartine Half Eaten Microgreens with Rice and Veggies
Other ways to use microgreens include throwing them in your smoothies, adding them to soups (blended in or as garnish), and on their own as a stir-fry.
We placed our indoor garden in our dining room. When it’s time to eat, our greens are staring at us, so why not include them in as many meals as possible?
Final Thoughts On Microgreens
Don’t get us wrong, we love and enjoy eating broccoli, especially romanesco broccoli. Yummy trees!
But now that you know microgreens provide 5X the amount of nutrients (at a minimum) of their mature counterparts, why wouldn’t you add this to your diet and your family’s?
One limitation is we see is cost. If you buy microgreens at the store or direct from a farm, they can go for $7 per 1-2 OUNCES, depending on the variety. That is wildly expensive, is it not?
Compare the cost of buying microgreens to growing them yourself. Your cost growing would be under $2 per ounce, including the cost of the seeds and potting mix. Data for this came from Agrifarming.
If you decide, and hopefully you do, to grow your own microgreens, keep them in an area of your house you frequent (such as a dining room or kitchen), so it’s a daily reminder to water, monitor, and harvest! Yum, yum.
Comment below if you’ve tried growing microgreens indoors or outdoors. Also comment below if you enjoy eating microgreens.
Love these pictures! Going to have to try growing some micro greens with our little guys!
Yes, do it! They’ll have fun. Embrace the soil everywhere. 🙂
Love to spend time near Sea !
Microgreens are fragile, yet resilient. This tray of seedlings collapsed after going without fa water for too long. After we watered them, the tiny plants rebounded quickly. Rinse the harvest and it’s ready to eat. Use it to garnish entrees, or mix it with full-grown salad greens.
Glad you had success growing microgreens, Jessica!
buy cialis cheap us pharmacy
[url=https://ciaiashe.com/]cialis daily cost[/url]
how to split pills cialis
cialis coupon cvs
generic levitra cheap
Краснодарский инструментальный завод
[url=https://ksiz.ru/]
Производство и продажа измерительного оборудования[/url]
[url=https://www.ksiz.ru/catalog/kalibry-api-5b]
Продажа калибров по API[/url]