Any links on this page that lead to products on Amazon are affiliate links and I earn a commission if you make a purchase. Thanks in advance for your support! Read the full disclosure here.
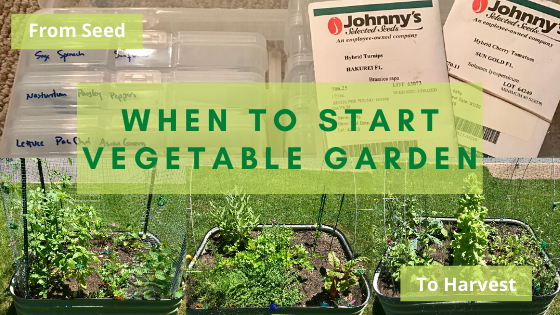
Let’s talk about when to start the vegetable garden, and how to start seeds and direct seed outdoors.
Before you rush to buy seeds or starts from the nursery, do some planning.
Grab a pen and paper. If you make a lot of mistakes or want to make edits in the future, use an electronic version like this planting guide. This has been a helpful resource to know key planting dates.
Planning your garden in advance may be the most time-consuming gardening activity.
Once you have a plan written down, the rest is just fun. Watering your seedlings will become a great morning activity with your kids. Every week or daily, check your spreadsheet, and see what needs to be done for your garden.
Table of Contents
When To Start Vegetable Garden: Sterilize Your Trays And Containers

Scrubbing trays clean with tiny sponge Spraying with disinfectant
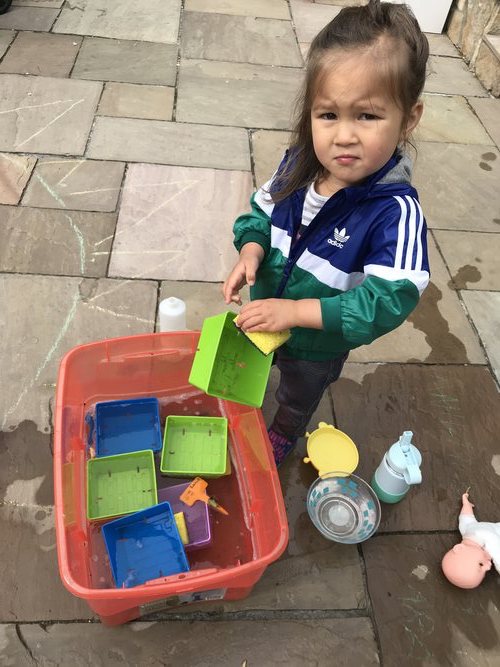
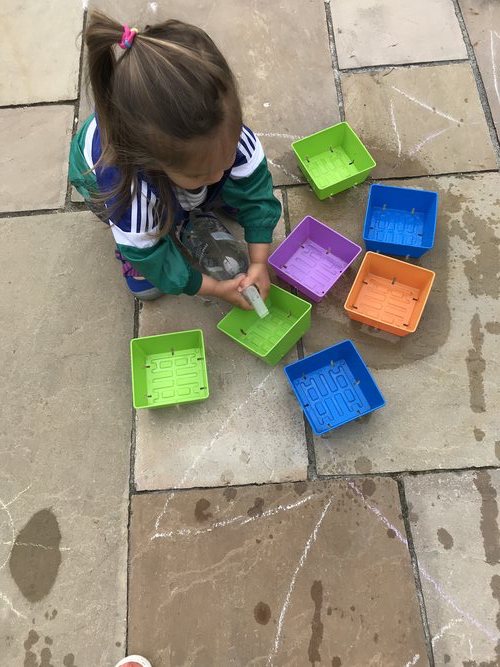
Before you start planting, ensure your trays and containers are sterilized. This is really important if you are re-using containers from the nursery or from your own stash.
Instructions for Sterilizing Trays:
- 1:10 bleach:water solution**
- Soak trays and containers for 20 minutes
- Rinse clean of all bleach solution
- Dry trays and containers
**For a solution without chemicals that’s 97% effective, use 1:10 vinegar: water solution.
We used the the non-chemical solution, so our daughter could help. She loves helping out and using spray bottles. Get those kids to work!
When To Start Vegetable Garden: How To Start Seeds Indoors
Once you have sterilized trays or containers, you can get planting.
We decided to start most of our plants from seed. There’s something special about planting from seed. If you want an easier route, it’s ok to plant transplants from your nursery.
One benefit was being able to follow the plant’s development every morning. Our daughter would take her magnifying glass and observe changes in the plants.
She would see them sprout (and get super excited), send out their first true set of leaves, and grow bigger each day. It’s like caring for your own baby. Super cute.
Follow the instructions provided from the seed packet to know when to start planting. Work backwards from the days of maturity listed. Take a look at when the temperature is appropriate to plant outdoors too. If you have a general idea for how hot or cold it’ll be during a given week, you can start estimating when to start seeds.
Sometimes the seed packets at your nursery are old. Germination rates of seeds decline the older the seeds are. Storage is also a big factor. Keep that in mind if you want to buy local seeds from a nursery.
We bought all of our seeds from Johnny’s and had great success growing!
This is why a spreadsheet like our Vegetable Garden Planner is super handy. Stay on track and don’t forget anything.
If you’re planting more than a handful of plants, you can quickly get all those planting dates mixed up.
Starting Seeds Using Soil-Blocker
Equipment
- Hand-held soil blocker
- Seed starter
- Compost, worm castings, worm compost
- Water
- Shovel or mixing tool
- Seeds of choice
- Containers
Instructions
- Take a container, preferably a rectangular one to fit the soil-blocker, and fill it with 4 parts potting soil (preferably 3 part peat to 1-2 parts perlite (known as peat-lite). If the peat has not been limed, throw in a handful of dolomite lime. Mix together 4 parts of the peat-lite to 3 parts compost, worm castings, or worm compost. In my example, I went to the nursery and found seed starter mix and worm castings, and followed the above proportions for my mix.
- Add water to your mixture so it's the consistency of oatmeal.
- Start creating soil blocks by using the soil-blocker tool. Press the soil blocker into the soil mixture 2-3 times to fill the block chambers. Using a twist motion can help ensure chambers are full.
- Scrape the blocker across the side of the mixing tub to remove excess from the bottom of the blocks.
- Depress the plunger to eject the blocks. Each block has a small indentation for one seed. The seed will sprout on the surface of the soil block. No water is needed for the first 2-3 days as soil blocks provide adequate moisture at first if the temperature is adequate.
Using this soil-blocker was as easy as letting kids use cookie cutters for cutting out cookie shapes. Our daughter enjoyed using these plant markers to identify our plants. Watch carefully at the end when she swaps the two markers. Good thing we were keeping an eye on her!

- Eliminates the need for plastic trays
- Decreases likelihood of transplants becoming rootbound, as increased air flow between blocks air prunes roots
- Creates healthier, more vigorous transplants due to oxygenated roots
- Reduces transplant shock

- 100% nontoxic materials for eco protection.
- These tags can be used in every soil type because they are extra strong and resistant to bending.
- Easy to clean with household cleaner, not easy to fade and can be reused. Easy To Use & Long Lasting Frosted surface allows for easy writing; Completely UV resistant to withstand the effects of sun exposure outdoors.
Unlike starting seeds in trays or pots, you cannot use seed starter mixes alone for these soil blocks. If you try, the blocks will fall apart and crumble. They’re not dense enough. Follow the recipe above we used.
When To Start Vegetable Garden: Overplant
Don’t be stingy with your seeds. If your kids are helping, they’ll likely shake more than enough out for you anyways.
Why plant more than you would like to have in your garden? There’s a 65-90% germination rate for seeds. Of those that germinate, 60-75% will fail to become sturdy plants.
Here’s an equation for all you math lovers.
Example: 10 desired plants / 0.90 germination rate / 0.75 field rate = 15 seeds
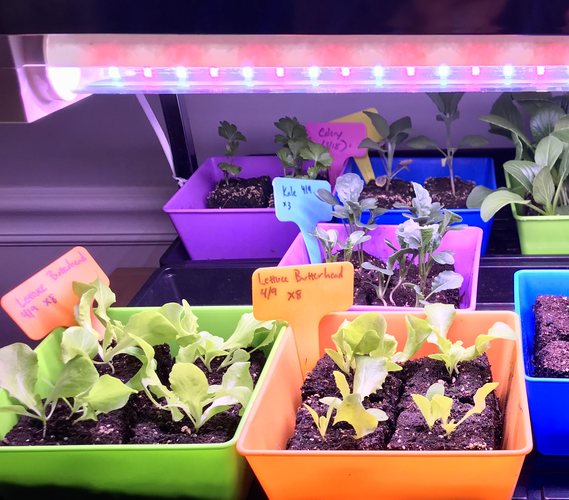
Lettuce Butterhead, Kale, Pac Choi, Parsley
What Do Seeds Need To Thrive?
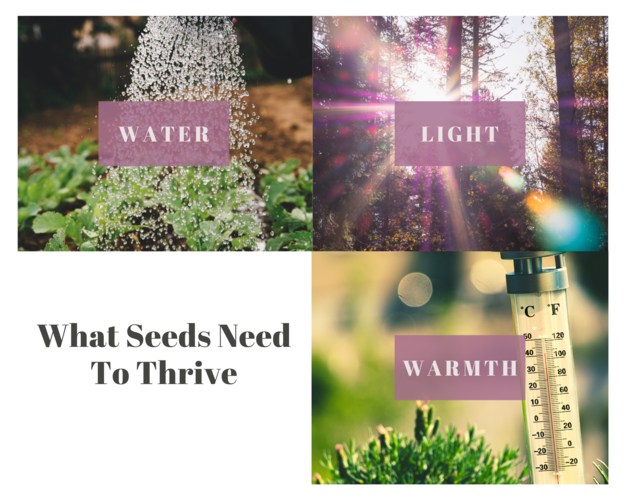
Enough Water
Look at the top of soil. If 30% looks dry, water the entire surface area from edge to edge. A spray bottle works for tiny baby plants. As seedlings grow, you’ll need to use a watering can.
A Lot of Light
Some seeds need darkness to germinate. Some plants germinate with light. Most will germinate under the soil in the dark. Propagation requires 18 hours of light per day. Your lamp source should sit 6″-12″ above plants. If they don’t get enough light, they’ll get leggy and fall over. These don’t make for healthy plants later on in it’s life. We use these LED lights.

Warm Temperatures
Germination depends on temperature. If you keep temperatures around 75 F, most crops will germinate. Some people use heat mats to help create a warmer environment.
Other Things To Do With Your Plants
Seed Starting Mix
Seed starting mix looks like potting mix, but it’ll also have ingredients like compost or kelp meal. While you can make it yourself, if you’re just starting out, there are a lot of seed starting mixes you can find already mixed for you. These will have the right mixture so we’d recommend buying a bag. Remember to look for OMRI listed products.
Algae
Low humidity can prevent algae from forming. Some people will keep a fan nearby to blow on the plants.
Roots
Add 10% vermicompost to your media to promote root growth.
When roots start to bind around the cell, you’ll need to increase your pot and give plants more space to grow.
Fertilizer
In the first 14 days, plants will take up everything they need. Fertilize every two weeks to maintain healthy nutrient levels for your seedlings. GS Plant Foods makes a good organic liquid kelp. Follow the instructions on the bottle for dilution.
That’s it! That’s all you need to know to start your seeds indoors.
When To Start Vegetable Garden: Thin Your Seedlings
After you’ve started your seeds, you don’t have to wait for your plants to grow to maturity to start harvesting and eating.
Thin your seedlings to enjoy fresh greens for your family within weeks.
Why Thin?
- Makes room in the garden for your crops to grow if you seeded densely
- You get to enjoy a mini salad with a variety of flavors
- Some kids love to use scissors and may be eager to assist! This is great for strengthening kids’ finger and hand muscles.
- Quite therapeutic…like pruning a bonsai.
Thinning Instructions
The video above shows how to thin outside, but the same rules apply for thinning plants inside.
- Cut at the soil level so plants don’t grow back.
- Cutting takes longer than pulling. Avoid pulling as this can disturb roots of surrounding plants.
- Get comfortable. This is not a quick task. Set yourself up with a small stool. Move around often so you don’t get numb. Don’t hunch over. Your back will thank you.
Surprisingly, our daughter didn’t want to help cut at first. She was more interested in taste-testing the greens. Not complaining here.
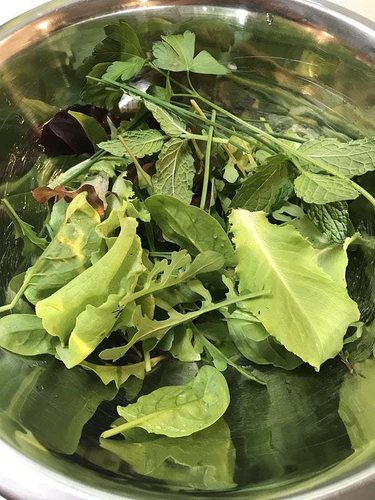
When she returned and saw the bowl full of greens, she hooted and ran around the yard with the bowl. We later used the greens as part of our dinner salad. So fresh, so good.
Some days kids are into helping and some days they’re not. Continue to give them the opportunity!
We needed fresh thyme and rosemary for roasted red potatoes the other day. Our daughter came running (not with the scissors, of course) to help.
We guided her to the plants and she snipped away! Thyme was easy. Rosemary was tougher to cut by herself.
Have you added thinning and harvesting to your toddler/kid activity toolkit? If not, give it a try!
When To Start Vegetable Garden: Harden off Your Plants Before Transplanting
We have felt so much joy and satisfaction growing our own plants from seed. We hope you’ve taken baby steps to do the same.
If you’ve started seeds indoors and plan to move your plants outdoors, make sure you know how to harden them off first.
The last thing you want to do is spend weeks, or months starting your plants in a warm nurturing environment inside, only to SHOCK them by planting them outside too quickly.
We will talk about plant hardening through the lense of a child. Today, we bring you…drum roll please…
Growmuse Garden Gabs – A Chat With A Child
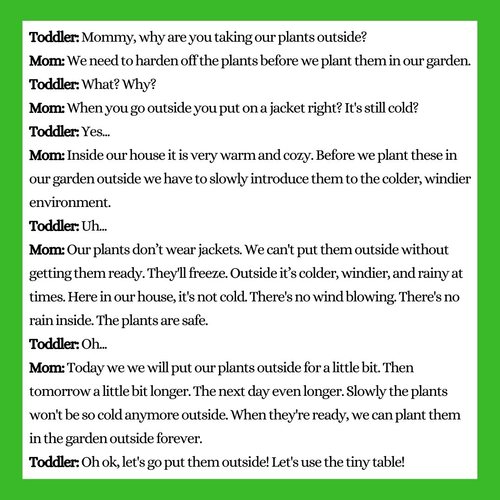
Now that our toddler understands what we’re doing, here are some instructions for you to use.
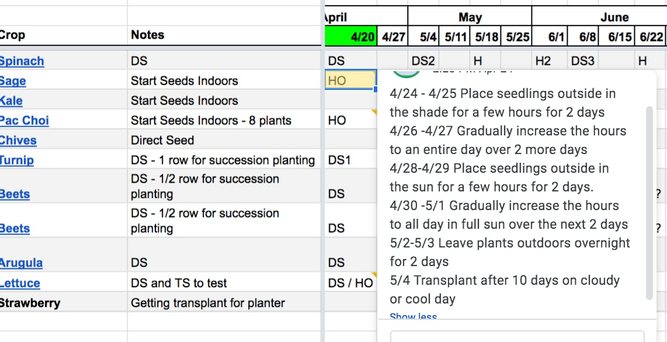
Note: In our Vegetable Garden Planner (download yours here), we added a comment on the week we wanted to start hardening off plants (key: HO), so we remembered what to do.
Pro-Tip: Set up daily calendar alerts for yourself, since this planner goes by the week.
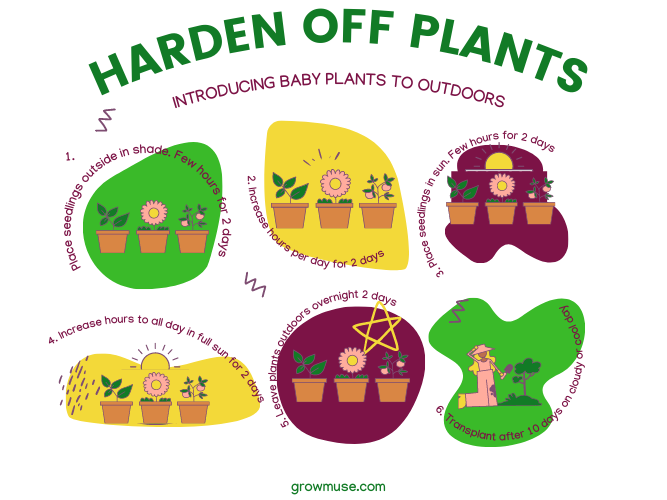
Hardening Off Process
Here’s how to gently introduce your baby plants to outdoor elements like the cold and wind very slowly.
- Place seedlings outside in the shade for a few hours for 2 days.
- Gradually increase the hours to an entire day over 2 more days.
- Place seedlings outside in the sun for a few hours for 2 days.
- Gradually increase the hours to all day in full sun over the next 2 days.
- Leave plants outdoors overnight for 2 days.
- Transplant after 10 days on a cloudy or cool day.
*Remember to bring plants indoors at night and cut back on watering each day.
This entire process will help plants get used to the cold and wind. The stems will harden off. By reducing watering each day, you will get the plants ready for transplant outside.
Avoid fertilizing your plants before or during this process. After you’ve transplanted them outside, you can use a diluted fertilizer solution to get them growing again. This reduces transplant shock.
From left to right: Lettuce, Pak Choi, Sage (notice the Pak Choi is crowded; we thinned these later)
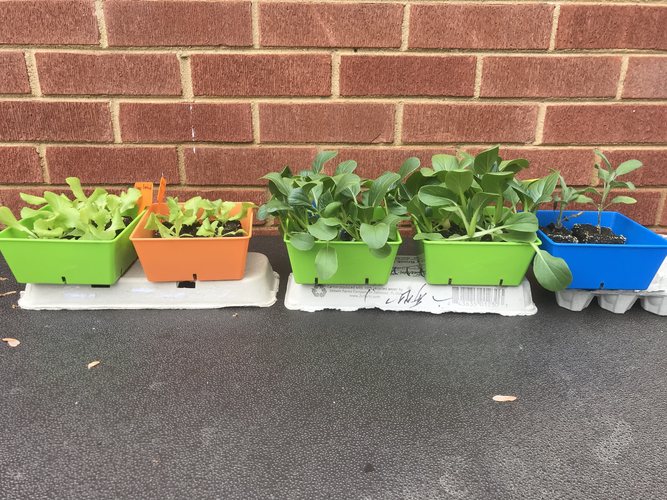
Look at those seedlings grow. Isn’t it beautiful? Not only pretty, but delicious!
Hopefully, this excites you enough to go plant something.
The picture above shows our sage, pac choi, and butter lettuce we moved to our raised beds…after hardening them off first for 10 days.
When To Start Vegetable Garden: How Kids Can Help With Transplanting
Pretty cute comments from our little girl here. We’re biased, we know. Just watch and see!
When To Start Vegetable Garden: Here’s Why Direct Seeding Outside Is Fun For Kids
If we haven’t convinced you start plant from seed yet, this might.
Kids Love To Direct Seed In The Outdoor Garden:
- They rip open seed packets, which takes a lot of hand strength. Now, they’re feeling good about themselves. Pump it up!
- Seeds fly all over the place. It’s like fireworks on the 4th of July! Who wouldn’t love that?
- They take a handful of seeds out of different packets. Randomness is just a blast.
- Then, they squish the seeds down into the soil. Because they love mashing stuff together.
- They walk away feeling super accomplished for having helped in the garden.
Why Is It Beneficial To Direct Seed?
- Some seeds prefer this over being transplanted like carrots, turnips, beets, and some greens. Read the seed packet as the instructions will guide you to direct seed versus transplant.
- It is AWESOME to see your seeds sprout. It’s really really exciting to see green things popping up in the garden. This is true for newbies or garden pros.
- You learn what different plants look like in the early stages of life. You become familiar with a sprouted seed you planted versus a weed that’s growing and need to pull ASAP!
- It’s just super easy.
Direct Seeding Is Not Hard For Adults If:
- You’ve mapped and measured out exactly where in the garden your seeds will grow.
- You have a helper who is actually helping and not climbing all over you. Ahem kids…Really wish we had taken a video of our daughter climbing on my back.
- You keep track of your seeds. This means watching exactly where your kids just smushed seeds, so you can label what’s growing where.
- You record the number of days until germination for each seed. Every day you’re checking moisture levels. It’s super important in the early days. If the top of the soil is 30% dry, you need to water the whole line of seeds.
- If the forecast calls for rain, you should not need to water.
- Sometimes the soil is too hot for seeds to germinate. If the air temperature is above 80 F, it may be difficult to get seeds to sprout. That being said, you could plant seeds a bit deeper to keep seeds from the hot soil surface.
What is a Garden Plan?
“In preparing for battle I have always found that plans are useless, but planning is indispensable.”
-Dwight D. Eisenhower
If you’ve read our previous posts, you know how much time and prep work has gone in to planning our raised garden beds. The whole purpose of Growmuse is to involve our daughter in gardening. We want to include her in every single step.
Like Eisenhower said above, always have a plan but know you might throw it out the window.
In the excitement of getting our seeds outside to the garden with our daughter, we completely forgot to measure exactly where the line of seeds would go.
This was a big error. While we did mark out roughly where each seed would go, it was not precise. We’d like to think if our daughter wasn’t running around, perhaps distracting us, we would have remembered to measure.
But then she wouldn’t have enjoyed the pleasure of everything listed above about how direct seeding is fun. Why would anyone neglect a child of that pure joy?
We ended up planting our seeds so close that later on we had to reorganize and plant our lettuce transplants in another area.
We also had to thin out the area around our root crops. Check out the before and after images below after we direct seeded the beets, turnips, and arugula.
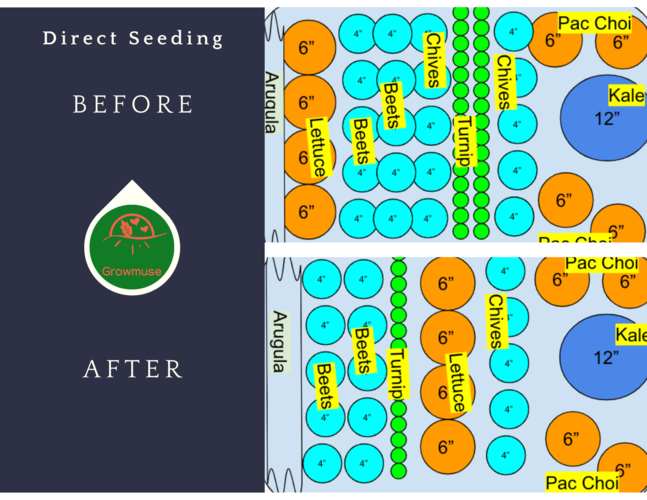
You must have a plan, AND you must be ok if it doesn’t go according to plan.
Lessons Learned Gardening With Kids
- We’ve learned to let go of perfection.
- When there’s a toddler by your side, crazy things can happen. Doesn’t matter how much you’ve pre-planned.
- Sometimes you know you need 4 inches for spacing. Then, your toddler keeps running away. You run after her. Then come back to planting and later realize you’ve planted 4 rows – 1 inch apart. OOOPS. That’s why thinning later on is crucial.
- The seed packet says to place 1-2 seeds every inch. Your kid grabs a handful and smushes them into the soil. Not worth fixing. We’ll thin later.
- We’ve noticed seedlings popping up in areas where they should not be. Wonder if someone shook her hands all over the place scattering seeds everywhere. At least they’re growing, right?
What We Accomplished After 11 Weeks Planting
Planting includes:
- Starting seeds
- Buying a few seedlings at a nursery
- Hardening off our plants
- Transplanting into the garden
- Direct seeding in our raised beds
Every week we’ve followed along in our vegetable garden planner. We never feel overwhelmed with what we have to do each day or week.
On Memorial Day, we went outside to give you a garden tour. Our daughter helped us along the way, naming some of her favorites so far.
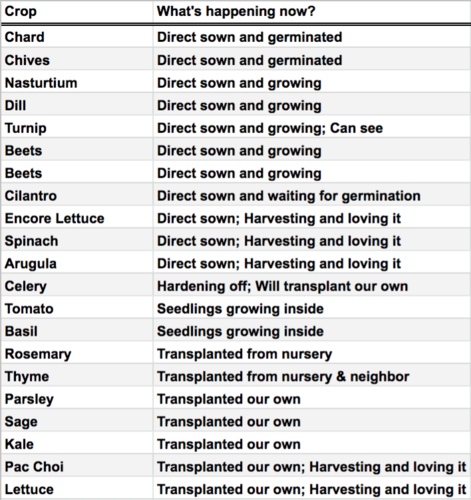
What Happened With Our 21 Crops After 11 Weeks?
What Can You Do With Extra Plants & Harvests?
You Can Share Them!
If you’re starting from seed, you’re likely planting more than you need. Don’t let those plants go to waste and share them with friends and neighbors.
Our daughter snapped this photo while riding in the wagon. Off to give some kale and parsley plants to neighbors.
You Can Eat Them!
We started with baby salads from thinning our plants, and now we are getting full on big people salads. All it takes is a quick walk outside to clip some greens from the garden for any meal of the day.
We’ve never tasted spinach so good. It’s nutty!
This is what comes straight from the garden…
Variety of Lettuce, Arugula, Spinach, Chives, Mint
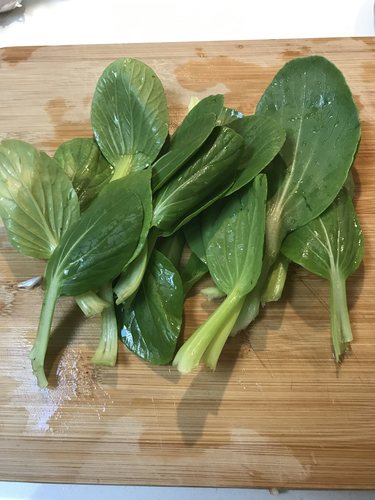
Pac Choi from the garden
And we end up with the delicious creations below toddlers even enjoy. Fresh arugula is too spicy for our girl; however, she loves it slightly wilted on pizza!
Dishes With Our Harvests:
- Fresh thyme for soup
- Kale chips baked with olive oil, salt, nutritional yeast (daughter dislikes raw kale or kale in soup, but she LOVES it as a chip…so much so she moved the bowl away from me and hoarded it all to herself)
- Mixed greens with peaches, red onions, sunflower seeds and drizzled with balsamic glaze, red wine vinegar, extra virgin olive oil, maple syrup, and pinch of salt.
- Pita pizzas with basil pesto, buffalo mozzarella, arugula (sundried tomatoes on one)
- Soba noodles with sauteed pac choi, celery leaves, edamame, mung bean sprouts (from my mom), and shredded chicken. All veggies sauteed in a sauce that included a drizzle of fish sauce, soy sauce, sesame oil, and tahini for creaminess.
Want Another Reason To Plant A Garden?
Is it a constant battle to get your kids to eat their veggies?
The solution may or may not surprise you.
There have been numerous studies showing kids who are involved in growing their own food are more inclined to eat vegetables.
“Students at schools with gardens learn about math and science and they also eat more fruits and vegetables. Kids eat healthier and they know more about eating healthy. It’s a winning and low-cost strategy to improve the nutrition of our children at a time when the pediatric obesity is an epidemic problem.”
– Debra Haire-Joshu, Ph.D., director of Saint Louis University’s Obesity Prevention Center
So…we tested out this theory. We planted turnips from seed in our garden. Only six weeks later, we had a bit of a harvest!
Do you think our daughter liked them? Watch below and see!
How To Get Your Kids To Eat More Veggies
Want more proof that kids will eat what they grow? Here’s a story for you.
We were eating lunch the other day. Our daughter gets up from the table and grabs her scissors.
We ask her what she’s doing and she says, “I’m going to cut mint for my water.” It was kind of funny and awesome at the same time.
She sees us drinking spa water (water flavored with fruit and herbs) all the time. In this instance, she wanted to make it for herself.
So what did we do? We helped her get some mint, of course! We brought the plant closer so she could cut a bunch, and she dropped the fresh cut mint into her water.
She sat back down for lunch and took a nice big gulp of minty H2O. Guess that’s a good reason to leave the table, don’t you think?
Help your kids eat their veggies. They’re so proud of eating food they helped grow or cook.
We hope this makes you want to go plant something green, or purple, or orange with your kids!
And Finally, Here’s What You Need To Know To Start That Vegetable Garden
We hope you feel equipped with the knowledge to plan and execute your first vegetable garden with your kids.
We planned our first garden using Google Sheets here. Feel free to use pen and paper, but we find the electronic organization made it much easier to manage our crops.
Now you know how to properly:
- Sterilize trays
- Start seeds using a soil-blocker (similar to cookie cutters/molds)
- Plant with enough water, light, and warm temperatures
- Thin your seedlings
- Harden off plants
- Direct seed outdoors
- Have fun with kids in the garden
- Share your plants and make delicious meals from your harvests
Lastly, and maybe most importantly, you’ve learned how to get your kids to eat more veggies!
Happy Gardening.
Growmuse.com is a participant in the Amazon Services LLC Associates Program, an affiliate advertising program designed to provide a means for sites to earn commission by linking to Amazon.com. This is done at no cost to you. Read the full disclosure here.