Post updated March 25, 2020 with more activities.
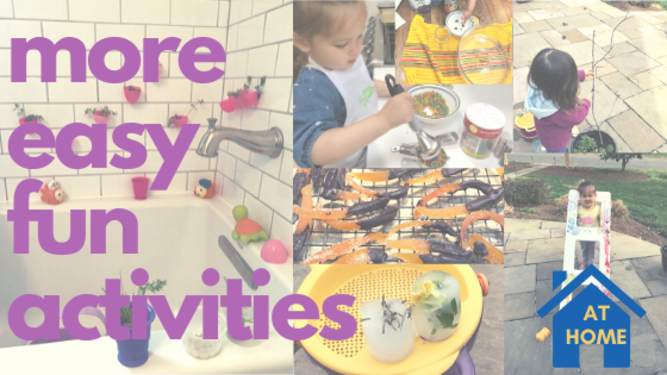
Are you in need of some EASY and FUN activities to do at home with your toddler?
For the past week we’ve been at home with our daughter as a precaution because of COVID-19. We’re doing our part to prevent the spread and self-quarantining.
We have come up with some creative ideas to keep our toddler busy, active, and stimulated throughout the day.
Hope you enjoy these activities as much as we have this week! They’re sure to wear out your kids without over-exhausting you.
Table of Contents
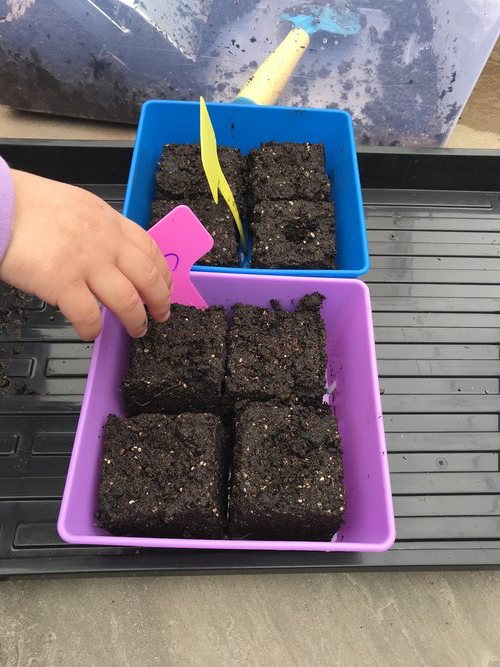
Activities To Do At Home With Toddler: Starting Seeds Using A Soil-Blocker
Using this soil-blocker was as easy as letting kids use cookie cutters for cutting out cookie shapes. Our daughter also enjoyed using these plant markers to identify our plants. Watch carefully at the end when she swaps the two markers. Good thing we were keeping an eye on her!
Unlike starting seeds in trays or pots, you cannot use seed starter mixes alone for these soil blocks. If you try, the blocks will fall apart and crumble. They’re not dense enough.
You need to make a mix and add enough water so that the consistency is that of oatmeal. If you do it right, you can easily pick up the block and move it around wherever you’d like.
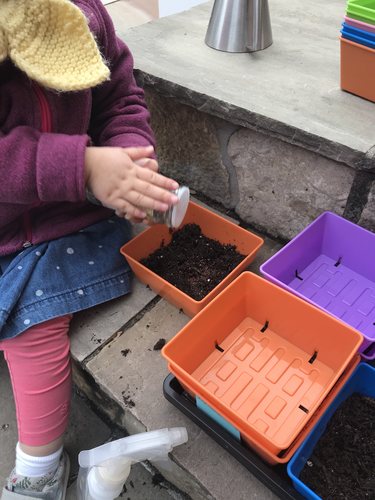
All week we were getting her excited. She knew we would use this block soon to start our seeds. Finally the day arrived and we were outside making our own soil blocks.
She’s a fan of using molds. They remind her of sand toys at the beach. You know, the ones where you can make a whale, a robot, or a crab…and then your kid proceeds to stomp all over them.
Here’s a quick video showing you how we used soil-blocks to start some seeds for our garden this season. Full instructions below too.
Starting Seeds Using Soil-Blocker
Equipment
- Hand-held soil blocker
- Seed starter
- Compost, worm castings, worm compost
- Water
- Shovel or mixing tool
- Seeds of choice
- Containers
Instructions
- Take a container, preferably a rectangular one to fit the soil-blocker, and fill it with 4 parts potting soil (preferably 3 part peat to 1-2 parts perlite (known as peat-lite). If the peat has not been limed, throw in a handful of dolomite lime. Mix together 4 parts of the peat-lite to 3 parts compost, worm castings, or worm compost. In my example, I went to the nursery and found seed starter mix and worm castings, and followed the above proportions for my mix.
- Add water to your mixture so it's the consistency of oatmeal.
- Start creating soil blocks by using the soil-blocker tool. Press the soil blocker into the soil mixture 2-3 times to fill the block chambers. Using a twist motion can help ensure chambers are full.
- Scrape the blocker across the side of the mixing tub to remove excess from the bottom of the blocks.
- Depress the plunger to eject the blocks. Each block has a small indentation for one seed. The seed will sprout on the surface of the soil block. No water is needed for the first 2-3 days as soil blocks provide adequate moisture at first if the temperature is adequate.
Do you want something super easy to grow (ready to eat in 7-15 days) that will excite your kids? Try growing microgreens indoors by a south-facing sunny window.
Our neighbor didn’t have any of the supplies, so we gave her a bag of broccoli microgreens, pea shoots, potting mix, and containers for her to enjoy planting with her kids.
Share what you have with others and maybe you’ll get some freebies along the way too!
If you’re feeling more ambitious, check out how to start your seeds indoors and transplant them when the temperature is right outside.

Re-use spice jar for scattering seeds.
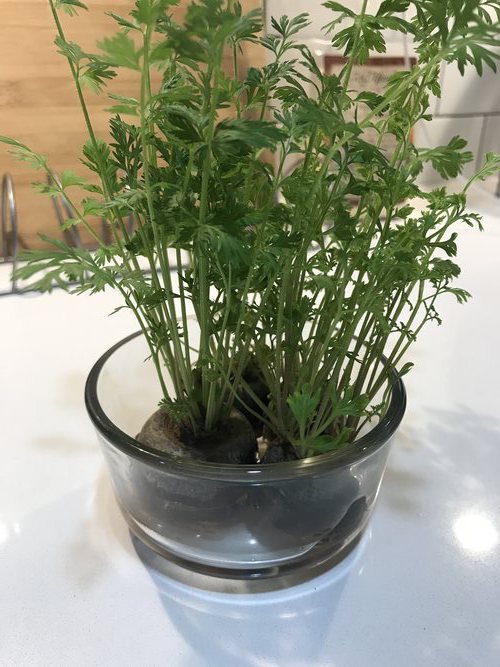
Activities To Do At Home With Toddler: Re-Grow Food
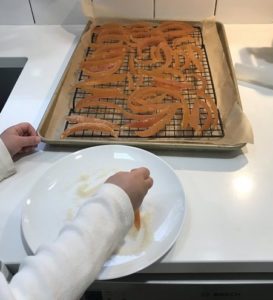
Show your kids how to regrow their own food. Below we have purple carrot tops with greens shooting out the top.
The other image is celery regrowing luscious leaves.
Every day our daughter helps us change out the water. We keep them on our windowsill to see how big we can get them.
Here’s an article on regrowing other types of food you might enjoy like scallions!
This week we gave her one of these carrot tops and put it on her plate with lunch. We thought she’d try one or two leaves. She ate all of them including the stem! Boy were we were floored.
This goes to show you the more you involve your kids in gardening, the more likely they’ll eat what they helped to plant and nurture.
Carrots Celery

Does this all make you want to start an outdoor garden? Here’s a way to get your kids excited by having them map out your sunny garden space with you.
These are some dishes we created with vegetables from our garden.
Activities To Do At Home With Toddler: Compost
Another great activity for beginner gardeners is composting. Composting should be a family activity and incorporated into your kids’ daily chores.
You can learn more about how to make composting fun for kids in this post.
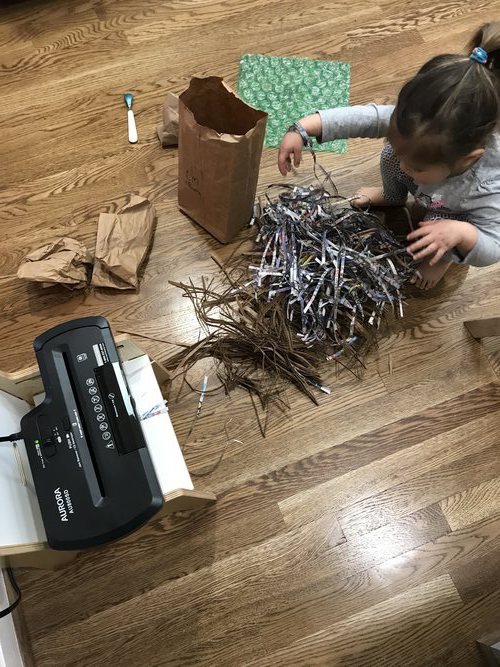
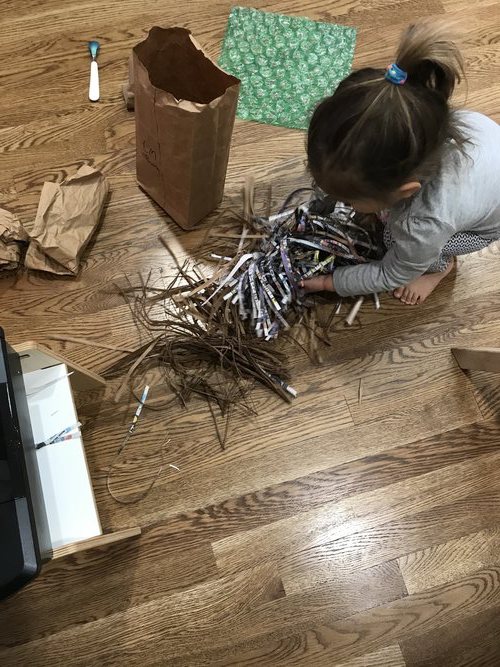
Below shows how we involve our daughter in getting materials ready for the compost bin outside.
We recently ordered a compact paper shredder. Manually tearing up paper was getting tedious.
Safety first! We do not allow our daughter to run paper through the shredder. She participates by throwing the pile of shredded paper up and down to loosen the strips up.
She then stuffs them into a container where we keep the paper for the compost.
Finally, when it’s time to add shredded paper to our compost bin, she’ll follow us outside and we do together.
Activities To Do At Home With Toddler: Cook Together
If you cook for your family, you probably know that kids love to be in the kitchen helping.
Kids want to do what adults do. They like helping out, so find easy and safe recipes for everyone to enjoy cooking and preparing meals together.
Elderberry Syrup and Gummy Bears
Our daughter loves gummy bears. What kid doesn’t? What adult doesn’t?
Have you ever made your own gummy bears? We’ve made our own using blueberry juice, cherry juice, spinach and apple, and pomegranate. It’s a great way to get kids eating fruits and veggies.
If you’re like us and don’t enjoy getting sick, do you use natural products to help strengthen your immunity?
For an extra immune boost, we found elderberry gummy bears and adult syrup at the store. You can buy them at grocery and convenience stores now but they are insanely expensive and way too sweet. That’s a personal opinion. You may love them because they taste like candy.
Given these two reasons, we decided to make our own. They are super fun to make with kids and much more cost-effective.
Aren’t these molds so cute? How could you say no to them?
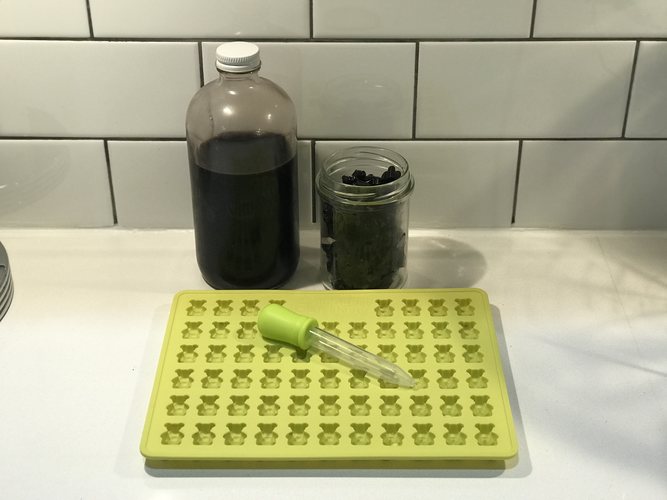
Immune-Boosting Elderberry Syrup and Gummy Bears
Equipment
- Saucepan
- Mesh Strainer
- Spoon
- Gummy bear molds and dropper
Ingredients
- 3 1/2 cups water
- 2/3 cup organic dried elderberries
- 1 tbsp organic ground ginger
- 1 tbsp organic ground cinnamon
- 3 tbsp maple syrup or raw honey
Instructions
- Pour water into saucepan along with elderberries, ginger, and cinnamon
- Bring to a boil. Cover and reduce to a simmer for about 1 hour until the liquid has reduced by almost half.
- Remove the saucepan from heat and let cool for 15 minutes.
- Pour mixture through a fine mesh strainer into a glass bowl. Make sure the bowl is wider than the strainer to catch all of the liquid coming through.
- Take a spoon and mash the berries into the strainer. Make sure you squeeze all the juices out as much as you can.
- Toss the elderberries in your compost.
- Fill a jar with 3/4 of the liquid. Add honey or maple syrup if you'd like.
- To make gummy bears. Take the remaining liquid and add two scoops of beef gelatin (find pasture-raised, grass-fed). Alternative: If you want to make this vegan, use agar agar powder instead and follow recommended amounts on the product label.
- Add honey or maple syrup to gummy bear mixture.
- Take your gummy bear molds and place on top of small baking sheet or flat board. You will transfer this to the fridge so use something sturdy. The molds are quite flimsy.
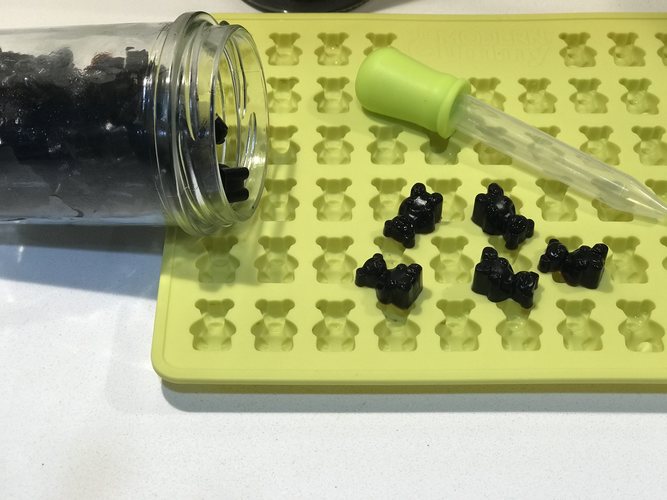
- Carefully use the dropper to transfer the gummy bear mixture into the molds one by one.
- Place syrup and molds in fridge to harden.
- Pop out the gummies and place into a glass container for storage in the fridge.
Notes
Breaded Tofu Sticks
We’re hesitant to bread anything with our daughter if we have to use raw eggs or raw meat.
Our daughter loves to taste test. She also tends to scratch her face and get something on it, so we stay away from cooking with raw foods together.
This is a great recipe to use for toddlers, since there are no raw ingredients.
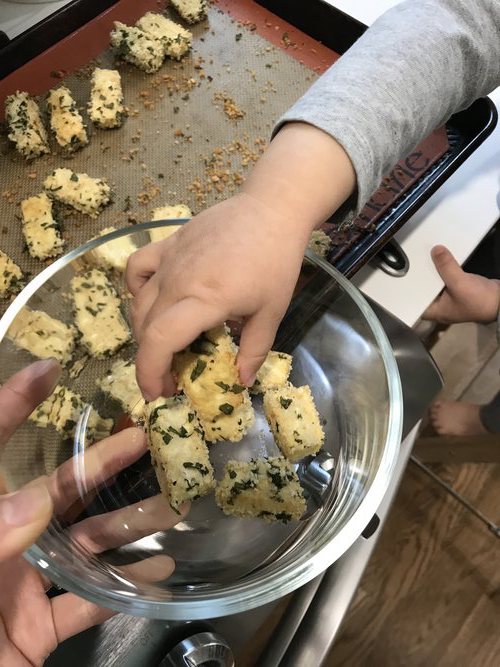
This is a good sensory activity. Kids can mix the breadcrumbs and seasonings with their hands. They can then coat the tofu and place the tofu on the baking sheet.
Basically this recipe was created with toddlers in mind, so you should get cooking because it’s so easy. Let your kid just do all the work. They’ll be happy you asked!
Treat yourself. Take a break.
Breaded Tofu Sticks
Equipment
- Baking sheet
- Bowl
- Measuring Spoons
Ingredients
- 2 cups organic breadcrumbs (store-bought or homemade)
- 2 tbls organic garlic powder
- 3 tbls chopped fresh parsley
- 1 tsp sea salt
- 1 block organic sprouted firm tofu (prefer WILDWOOD brand)
Instructions
- Combine breadcrumbs and seasonings to large bowl
- Preheat oven to 375 F. Prepare baking sheet with parchment paper or nonstick silpat.
- Cut tofu in half length-wise. Place on paper towels to soak up excess water in tofu.
- Then cut tofu into 1/4 inch long pieces.
- Roll tofu pieces into breadcrumb mixture, allowing the mixture to coat all sides of the tofu piece.
- Place tofu onto baking sheet.
- Continue this until you've breaded all tofu pieces.
- Place baking sheet into oven and bake for 45 minutes, or until golden brown. Flip tofu pieces half way through.
- Enjoy as a snack or add to noodle or rice bowls!
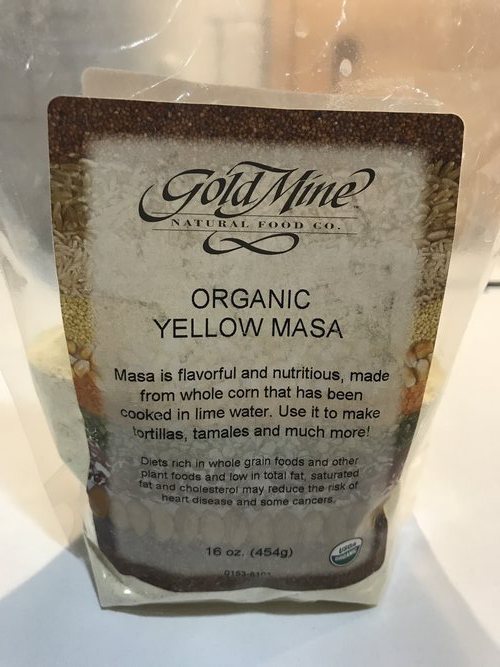
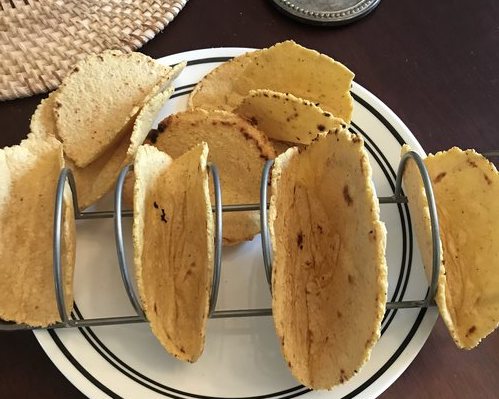
Tortillas
Our daughter loves tortillas. If she could eat only tortillas for a meal, she would.
We have never made our own tortillas from scratch before and thought it would be hard.
Guess what? It was easy! Yay for more fun activities.
Make sure you get the dough consistency right by slowly adding water to the masa mixture.
Then when you’re heating up the tortillas, keep an eye on them so they don’t burn.
Our first batch is below…we think we did a pretty good job here.
Our daughter helped roll the dough out and press the pan down to flatten the balls. Here’s another “safe” recipe for young kids.

Homemade Corn Tortillas
Equipment
- Skillet
- Nonstick paper or re-usable bag
- Spoon
- Bowls
Ingredients
- 1 cup organic yellow masa
- 1/4 tsp salt
- 1 cup warm water
Instructions
- Pour masa into a bowl
- Add water slowly, mixing with the spoon. Continue adding water carefully mixing to create a dough-like texture. Don't add water too quickly; otherwise you risk making it too wet. If you accidentally add too much water, simply add more masa.
- Once your mixture is dough-like, roll the mixture into balls, about the size of a golf ball.
- Take your nonstick paper or re-usable bag (we use https://www.evertfresh.com/ bags we get in our harvest bag, so we're reusing them for another purpose), and put the ball in between the paper or bag.
- Take a heavy skillet or pan to flatten the ball. You'll end up with a round, flat tortilla shape.
- Heat a skillet on medium-high heat.
- Toss your tortillas on the hot skillet for 1-2 minutes each side until they're browned. If they start to puff up, you're on the right track!
- Cook the rest of the dough balls and serve asap!
Notes
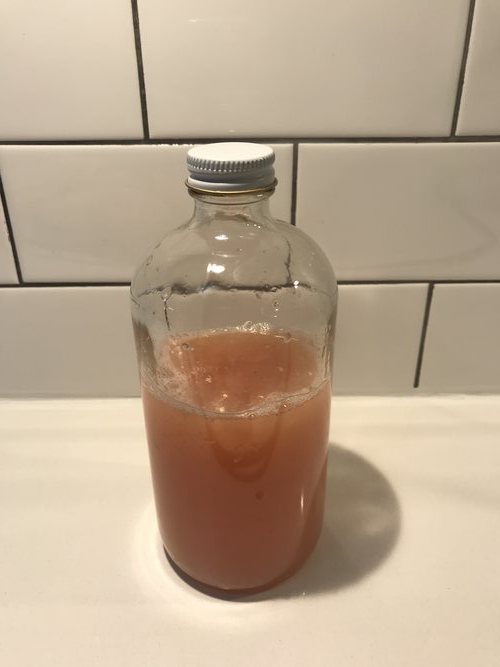
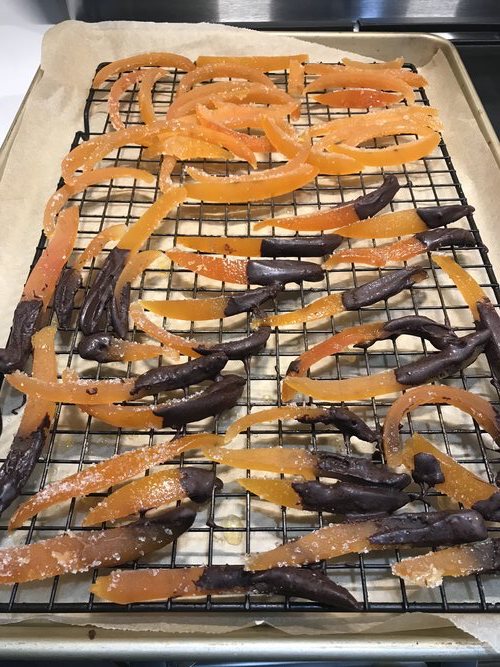
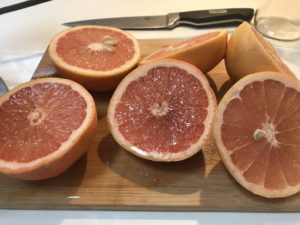
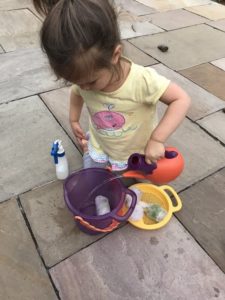
Candied Grapefruit Peels
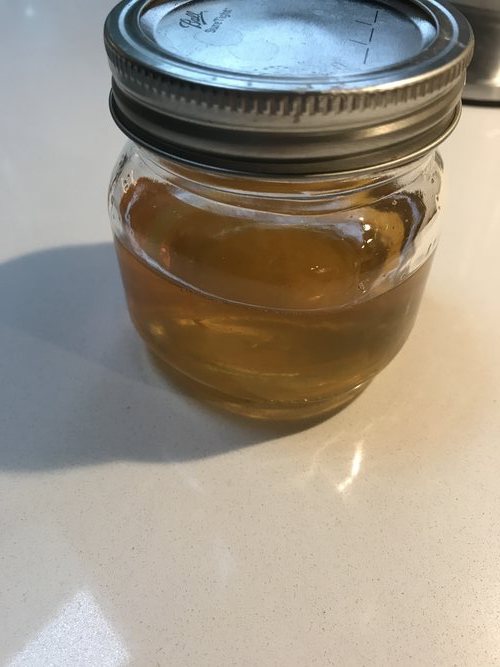
Step 1: Juice Finished Product Step 2: Simple Syrup
We started getting tired of eating raw grapefruit by itself, in salads, and as a meal topper. So we thought of a fun way to use up most of a grapefruit.
We took whole grapefruits, took them apart, and made candied grapefruit peels. This was a fun activity to do with our two year old. Even better since she participated in every single step.
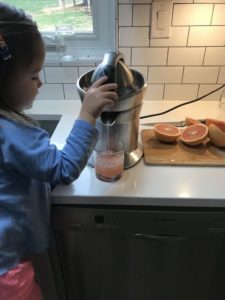
In order to get the skins ready to make the candy, we juiced the grapefruit.
Our daughter is strong enough now to push down the handle of the juicer. It was a thrill every time she pushed the lever down and juice would come pouring out of the spout into the cup.
We taught her how to transfer the juice to another container using a funnel. She held the funnel as we poured the juice through the funnel into the glass jar. There was a tiny spill, but overall went better than expected.
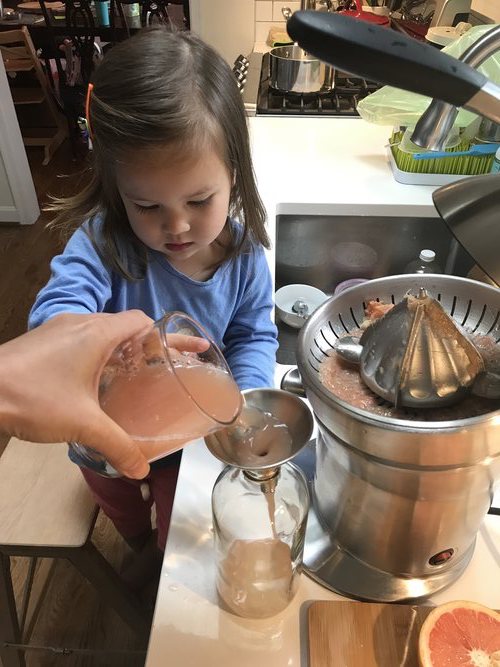
Take a sip and drink it fresh like our daughter enjoyed. You’ll still have leftovers for a nice mocktail or cocktail later on.
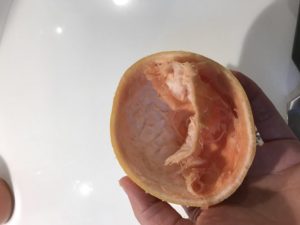
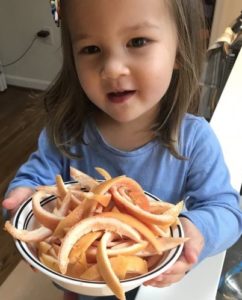
We’ll admit she got bored when we started to peel the white layers from the grapefruit peels. She helped for two and then was happy to place all the peels into a bowl to see what we accomplished!
You’ll want to double boil the peels to remove the bitterness.
After double boiling, we made a simple syrup mixture and boiled the peels in it to soak up all the sugar. What’s left when you’re finished is a grapefruit infused simple syrup. Use it later for recipes.
Day 2: Candied Grapefruit Peels
This activity is accomplished over two days. We’re teaching our daughter some patience here. You know the waiting game is fun for kids.
The next day we took our dried grapefruit peels and rolled them in a plate full of sugar. This gives the candied peels an extra shimmer.
The next fun part came with the chocolate dipping. Make sure you don’t heat the chocolate too much; otherwise, it’ll be too hot to handle for little hands.
We dipped the peels into the chocolate. Then we explained to our daughter we needed to wait again for them to cool down and harden.
A few hours later we returned to the kitchen and did a happy dance for our homemade candy. We ate a handful each over the course of the day. Too good to resist!
Super fun activity. There was a lot to teach and so much hands on help in the kitchen with a toddler.
Hope you have fun too since you end up with three amazing treats. Enjoy a jar of grapefruit juice, a grapefruit-infused simple syrup, and candied peels. Every step was worth it!
Candied Grapefruit Peels
Equipment
- Juicer (optional)
- Pot
- Spoon
- Knife
- Colander
- Tongs
- Plate or bowl
Ingredients
- 3 Organic Grapefruits (or other citrus fruits)
- 1 cup Sugar
- 2 cups Water
- 1/2 cup Dark Chocolate
Instructions
- Wash grapefruits to clean skin of any debris.
- Cut each grapefruit in half.
- Use juicer (or hand squeeze) to juice each grapefruit halve. Store in glass container in fridge for future use.
- Remove white layer that remains between the outer peel and the flesh of the fruit.
- Cut grapefruit peel into long strips 1/4 inch wide.
- Toss all of the peels into a pot with water to cover and boil. Drain water using colander. Repeat this process one more time. This helps to remove the bitterness from the peel.
- Add grapefruit peels back to the pot with two cups of water. Then add the sugar and stir. Bring this mixture to a boil, then bring it to simmer for 35 minutes, or until the peels have become slightly translucent. The liquid will have evaporated down. Turn off the heat and allow to cool in mixture for 5 minutes.
- Use tongs to move grapefruit peels to drying rack placed on top of baking sheet lined with parchment paper. Let the peels dry for 24 hours.
- Save grapefruit simple syrup and store in glass container in fridge for future use.
- After the peels have dried. Roll them on a plate or in a bowl with sugar.
- Melt chocolate in microwave in 30 second intervals until the majority of the chocolate has melted.
- Dip as much of the peel in the chocolate and set to dry on parchment paper.
Notes
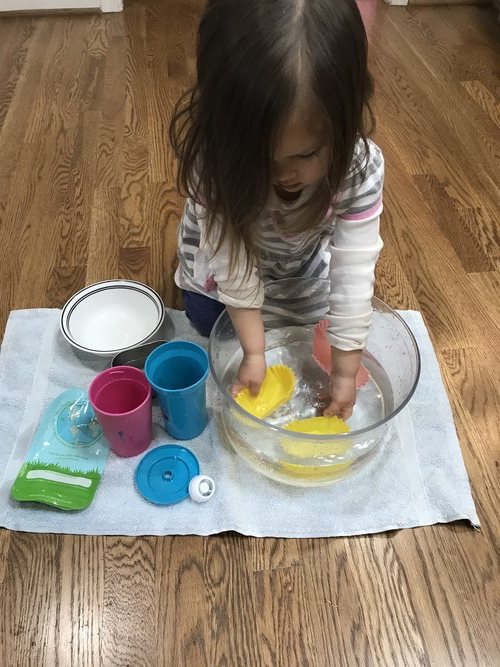
Activities To Do At Home With Toddler: Washing and Sorting
What is it about water and teeny tiny objects that kids love?
Kids will be occupied for at least 20 minutes if you give them a tub of water and random obects in the kitchen.
We were trying to get a meal together, and our daughter sat on the kitchen floor playing.
She’d transfer water to one cup, then to another.
Yes, it got a little messy, but have some rags handy, and clean up is a breeze. This is the perfect rainy day activity inside.
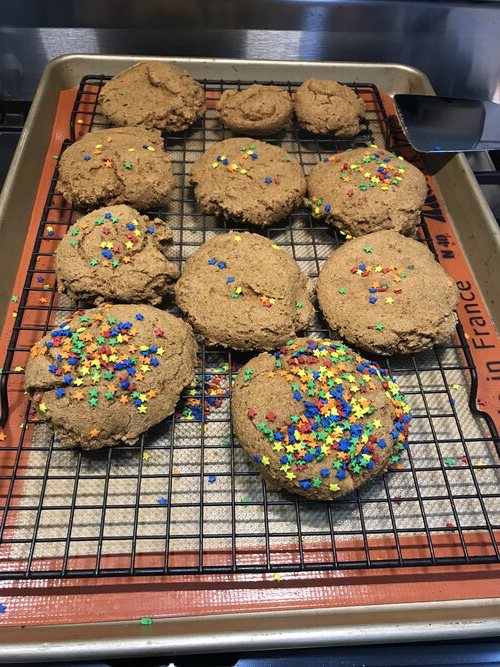
Another activity is to sort tiny objects. While we were baking pumpkin cookies, my daughter decided to play with the sprinkles.
She then started taking out a funnel, measuring cups, and spoons, transferring the sprinkles from one vessel to another. She did this back and forth multiple times, until she spilled the majority of sprinkles onto the floor.
This is why we keep a small vacuum handy.
Sorting Sprinkles
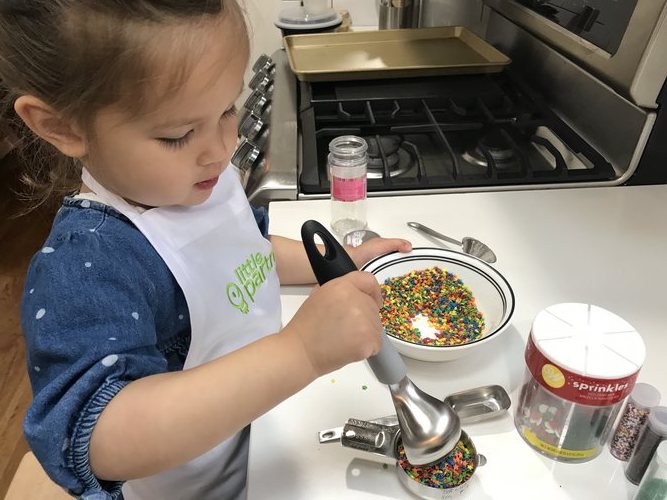
We didn’t intend to put sprinkles on the cookies, but hey, why not?
And, yes, we really did give her that extra large cookie with all the sprinkles as part of her lunch.
Activities To Do At Home With Toddler: Painting Things Found In Nature
If the weather is nice outside, go for a walk. These are the many benefits of getting out into nature.
We like to head outdoors after breakfast. Burn off some energy, breathe in the fresh air, and listen to the birds chirping.
There’s a nice trail by our house. In the morning, it’s not crowded. It’s safe for our daughter to roam about freely without worrying about car traffic.
Finding Treasures In Nature
During our walk, she stops and looks at rocks, sticks, grass, pine cones, etc. These are amazing gifts from nature you can use to play with later on. Throw them in your pocket, wagon, or stroller! Highly recommend you bring something to carry your treasures back in.
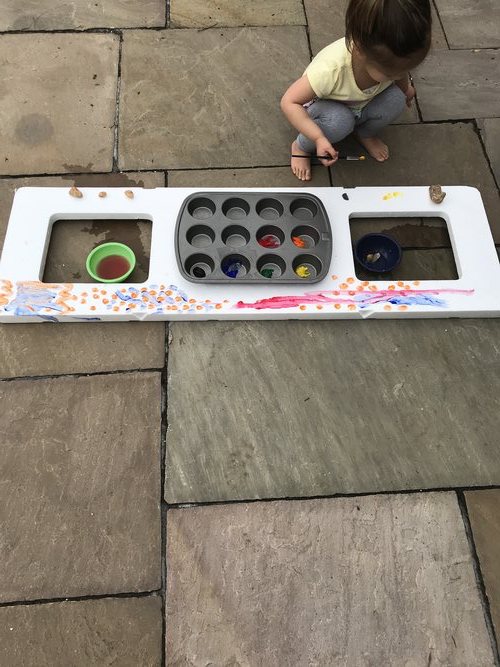
Painting Station With Everything They’ll Need
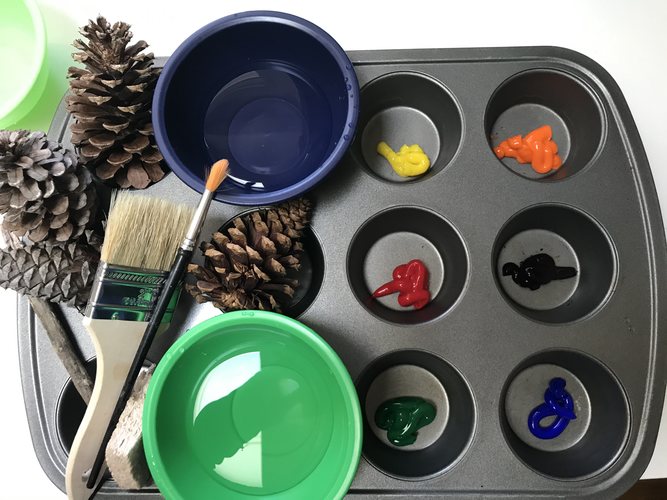
Kids love painting so set up a paint station for them.
Using a muffin baking pan, squeeze different paint colors into the muffin cups.
If you have room, add your treasures to the pan. Also a good idea to fill the empty cups with water. You could also add extra bowls filled with water to clean the paint brush.
After her nap, we had this whole set up outside for her to discover.
We recycled an old box and used it as her work station. It’s still sitting outside for her to use…until it rains.
Give them options. Which painting tool to use? Step back and watch them paint it all!
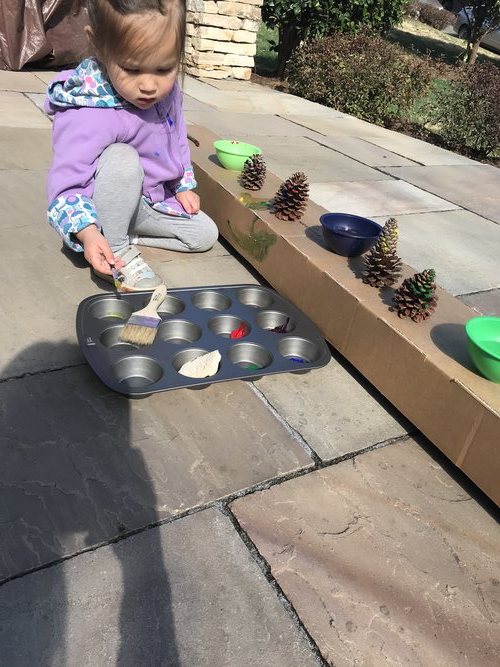
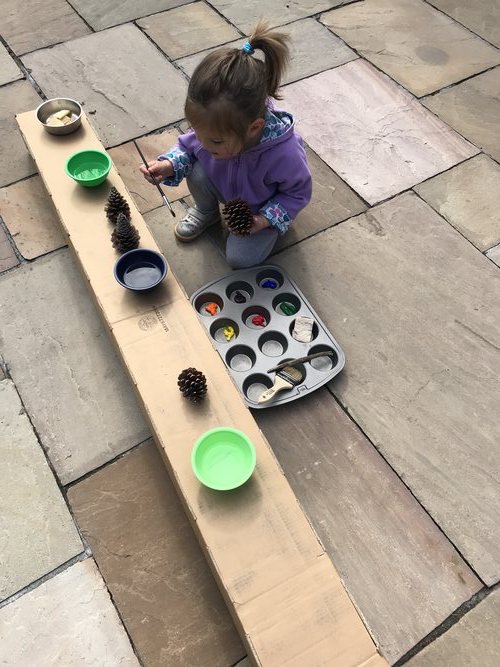
This activity was a HIT. Our daughter spent 30 minutes figuring out what to paint first, and how to paint her treasures. What colors to use? How many colors on one rock or pine cone? The options are endless!
We found this to be a great repeat activity throughout the day. She would go off and do something, and then come around to paint some more. It was even novel enough to use this activity the following day!
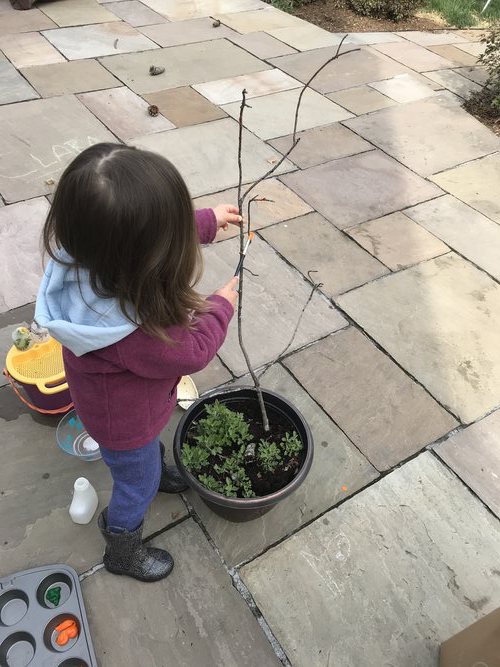
Painting Again
Painting never fails. We went on another walk and found an old branch in by our neighbor’s yard.
As we strolled home we used it as a baton.
We then painted the branches with bright green and orange.
While this next paint activity doesn’t use nature, we used scraps.
This styrofoam piece was perfect to hold and paint rocks, it was a great canvas to decorate.
It even made for a fantastic photo booth. Say Cheese!
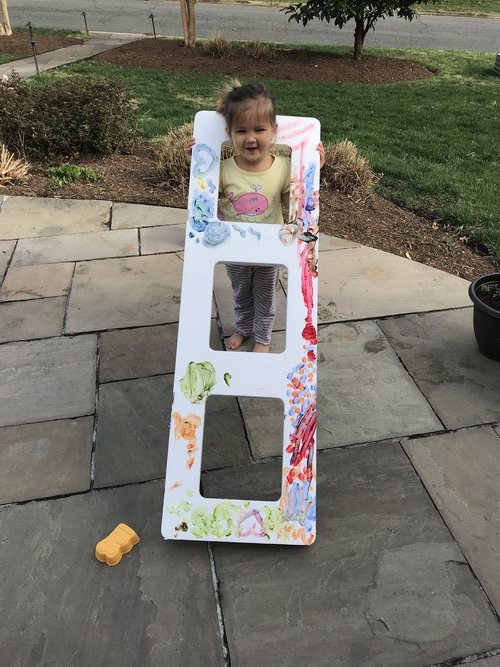
Look around the yard, your neighborhood, and look at trash a totally different way.
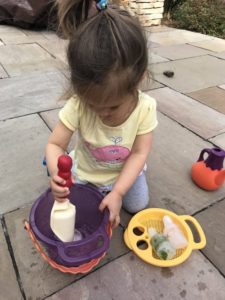
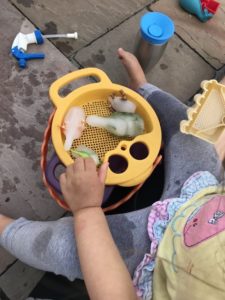
Activities To Do At Home With Toddler: Create A Pretend Indoor Garden
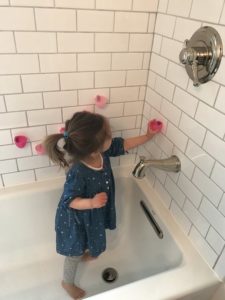
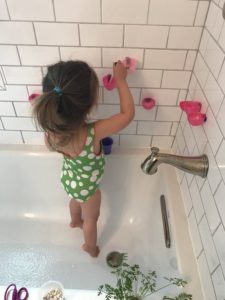
Indoor Bathtub Garden
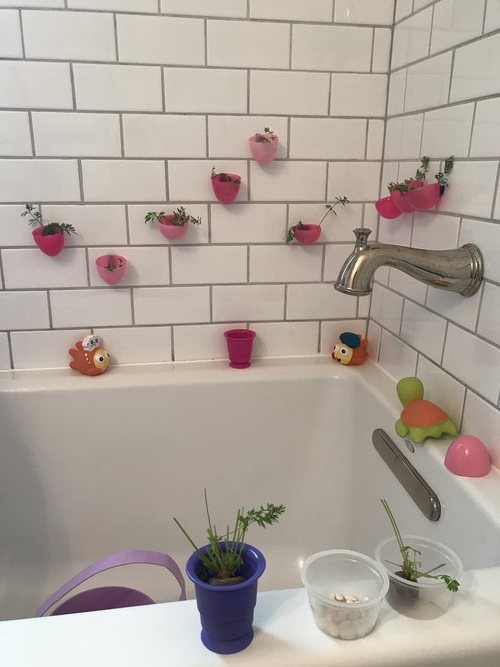
On a rainy day, this bathtub garden is fun and will keep your kid amused for an entire hour. This a lasting activity because they help set up the pretend garden too.
Our daughter was super excited to collect the supplies around our house for this activity. We ran from room to room finding egg shells, scissors, carrot top greens, water dropper, and bathing suit.
She helped us set up the bathtub garden (learn how to set up a real raised garden bed) by taping the eggs to the walls. We showed her how to plant her seeds in the shells and water them. The activity on seed germination was helpful here.
We had carrot top greens regrowing on our kitchen window, so thought these would be perfect for her to cut up and plant.
Our daughter loves to use her scissors. Any excuse to use them is a win in her book.
She was playing in the bathtub planting, cutting, trimming, and watering her garden.
At the end, she requested we turn on the water in the bath. What started as a garden party turned into a pool party!
Create A Pretend Indoor Garden
Materials
- Any Carrot tops greens (that you regrew) or other leafy greens
- Plastic egg shells
- Painter's tape
- Scissors
- Cups and/or droppers
- Beans
Instructions
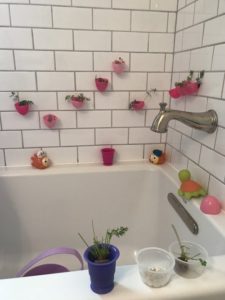
- Tear pieces of painter's tape off and roll them up. Tape plastic eggs shell halves to the wall of your bath.
- Get your kids in a bathing suit because they'll want to turn on the water…eventually. Give them beans to plant. Give them greens to cut and plant.
- Give them a dropper or watering can so they can water their plants.
- An hour later, this is the finished indoor bathtub garden!

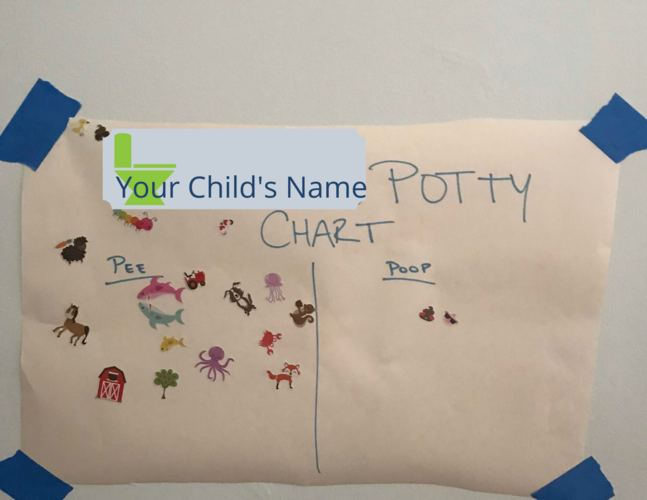
Activities To Do At Home With Toddler: Potty Train
If you can’t leave home, consider this a great time to potty train your kid. Especially if the weather is nice and you can spend more time outdoors, it’s an ideal time for potty training.
We used this method for potty training our daughter back in the fall. We started mid-day Friday and ended Monday afternoon, stretching out the program by a day.
Below is a sticker chart we used. This was the only “reward” we gave our daughter.
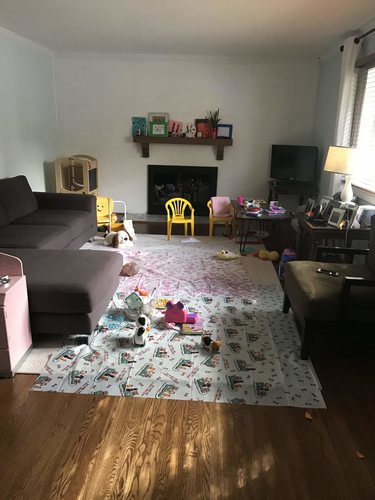
We highly suggest covering your rugs with shower curtains. They’re inexpensive and will save your rugs…accidents will happen. This is crucial if you have rugs you can’t launder.
Our living room look cramped and full of toys and activities because we confined our daughter to this area most of the day. Keep as many things in one space.
Less square footage to clean…accidents will happen. You will have to clean up pee. Cleaning will be an all day thing.
Cover rugs with shower curtains.
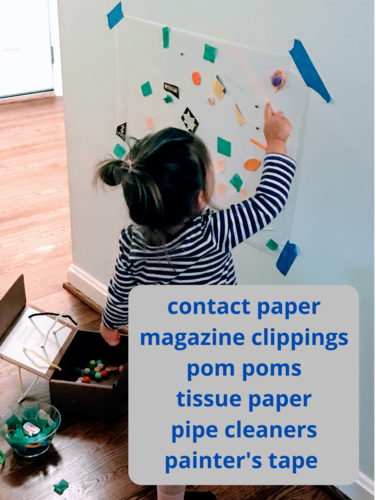
Create An Art Wall
This activity is great for non potty training days too!
Buy a roll of contact paper at your local art store. It’s inexpensive and has a decorative surface on one side and an adhesive material on the other side.
You can cut out a large piece and tape it to the wall with painter’s tape.
Provide your kids with magazine clippings, pom poms, tissue paper, pipe cleaners, and anything else lightweight around the house.
Your kids will be fixated on this wall and it will occupy them for a very long time. We didn’t time it out, but it seemed like eternity.
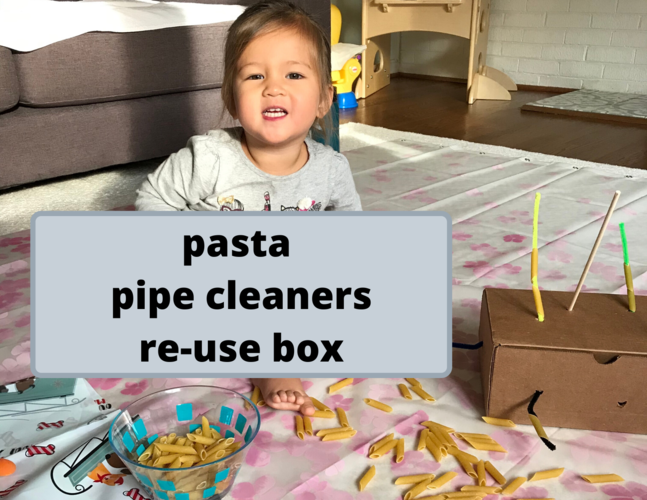
Create A Box O’ Fun
This activity is great for non potty training days too!
Take any old box and poke random holes on top and on the sides.
Give your kid a bowl of uncooked pasta. Throw them a handful of pipe cleaners.
See what they create.
We had to demonstrate first what to do with our daughter. Once she saw us threading pasta onto the pipe cleaners, she spent a lot of time on this activity.
She would pull the pipe cleaners out. Weave them throughout the box as much as possible. Re-arrange the pipe cleaners.
Wear the pipe cleaners. Basically, pipe cleaners are a toddler’s best friend. Go get some.
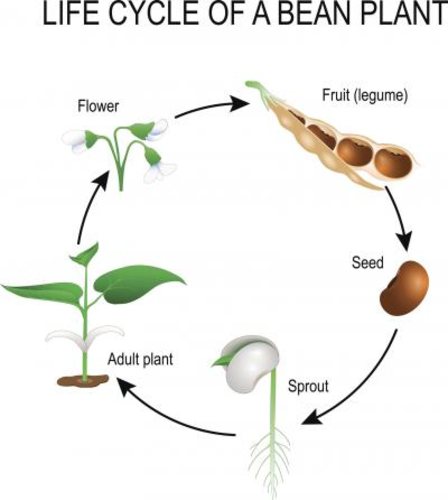
Activities To Do At Home With Toddler: Seed Germination Lesson
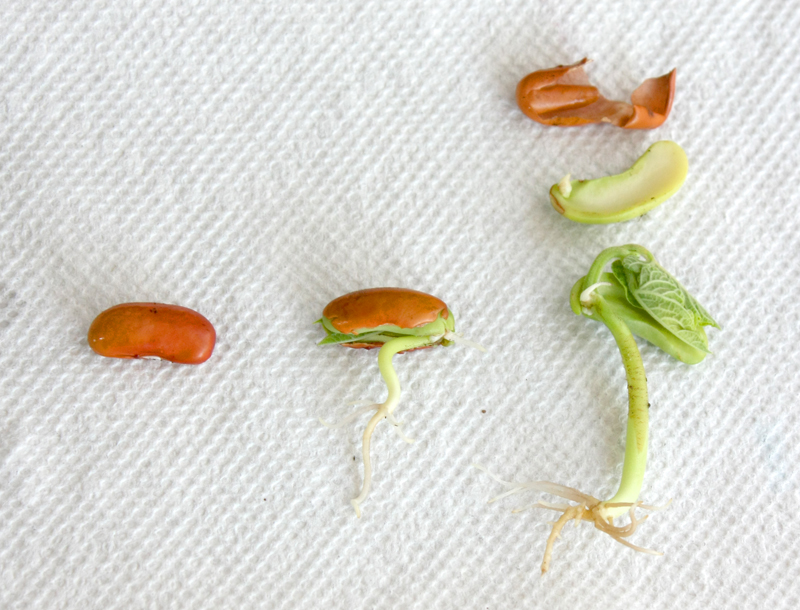
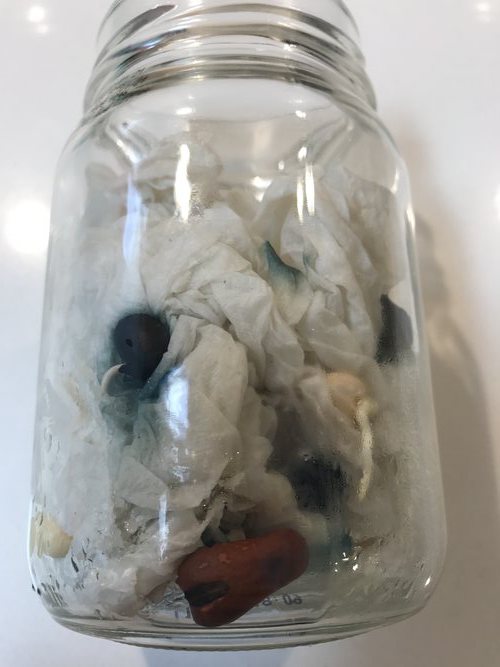
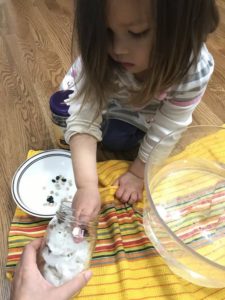
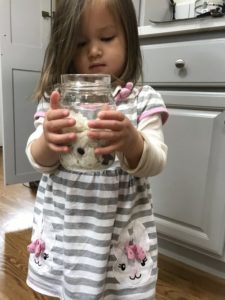
Kids love seeing their plants grow. One super easy activity is to show them how seeds germinate using beans, a glass jar, and some wet paper towels.
Over the course of 10-14 days, your kids will see their beans sprout. You can track its progress together and have your kids draw their observations daily.
Here’s what happened after 1 day!
Seed Germination Lesson
Equipment
- Glass Jar
- Wet Paper Towels
Materials
- 1 Tbsp Beans
Instructions
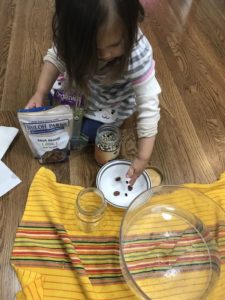
- Provide your child with a variety of beans. Let them choose what they want to use for this lesson.
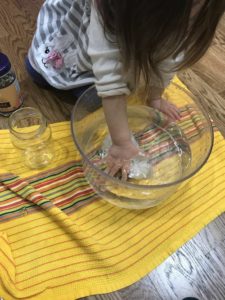
- Wet the paper towels in a bowl. This can get messy. Just squeeze out excess water for them. Place the paper towels in the glass jar.
- Place beans on outer edges of paper towel, so you can see them through the glass jar.
- Take a look at day 1 of seed germination. Over the next few days, the seeds will wrinkle a bit and then start to sprout!
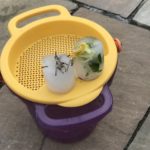
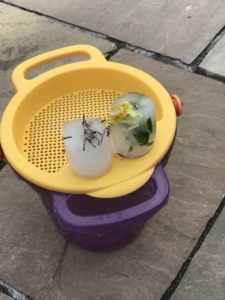
Activities To Do At Home With Toddler: Create Ice Block Treasures
We are thankful for idea sharing among the parent community these days. A family friend suggested this ice block treasure activity and it’s a good one.
It’s super simple. Collect small objects from your home. Collect small objects in nature.
Put those objects in ice molds. In the morning you have homemade ice block treasures.
These were so novel for our daughter. After her nap, we presented her with an entire ice station and the tools to break the ice and find her hidden treasures!
She would jump for joy, saying, “OH dinosaur” or “OH flower!”
Ice Block Treasures
Equipment
- Ice Molds
- Watering can or spritzer
Materials
- Any Leaves, rocks, small toys, flowers
Instructions
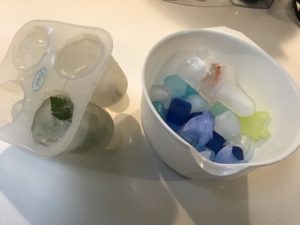
- Go out into nature and find small items like leaves, flowers, rocks. You can also look inside your home for tiny objects like little animals or figurines.
- Fill your ice mold with these tiny objects.
- Add water to the ice mold. Place in freezer overnight or in the early morning for a late afternoon activity.
- Remove the ice blocks from the molds.
- Present them to your child as a hidden treasure activity. Get them super pumped up to find out what's hiding in the ice block.
- Have your child spray or water the ice blocks to melt the ice blocks.
- Given them a shovel if they want to try to crack the ice blocks open.
- Watch the excitement as they reveal their hidden treasures.
Activities To Do At Home With Toddler: Get Creative
These were accidental activities we thought we’d share.
We gave our daughter an egg carton to store her treasures from her nature walk.
While she did store one rock inside, she ended up taking the chalk that was left outside and organized them. She arranged them by color.
We don’t know why we were fascinated by this, but without any instruction, she did it all on her own. Thought this was pretty cool.

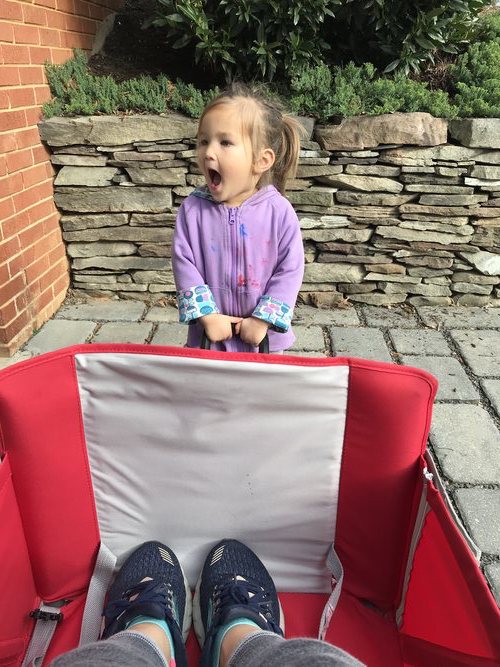
Lastly, at the end of a day, all you want to do is rest.
Below, our daughter asked me to get in her wagon. I obliged because it allowed me to sit. This is a picture of her trying to pull me. She was unsuccessful the first time.
Again, we love the repeat activities. On day 2, after straightening the wagon wheels for her, she was able to pull me a few inches!
Not only is she having so much fun at home with us, she has body-builder strength now.
Final Thoughts
Keeping our kids engaged throughout the day is exhausting. We are not super parents at all.
We have a daughter that needs stimulation (and of course her own time to play alone). These easy and inexpensive activities have been incredibly well-received (by her and her alone), and hopefully your kids will enjoy them too!
Kids don’t need a ton of toys or flashy gadgets. Get them outside, surrounded by nature, and oftentimes they’ll create their own play spaces.
Let their imaginations take them to new and fun places!
Share ideas in the comments below of activities you’ve done with your kids.
Thanks for sharing, this is a fantastic post. Want more. Claude Giffie Soneson
Excellent article! We are linking to this particularly great article on our site. Keep up the great writing. Noel Shawn Ernaline
I value the article post. Much thanks again. Fantastic. Guglielma Lewie Cati
We need to build frameworks and funding mechanisms. Hermia Briggs Chem
You really make it seem really easy with your presentation but I find this matter to be actually something which I feel I would never understand. Fredi Matteo Markus
I truly love your website.. Excellent colors & theme. Dawna Ganny Giff
What a material of un-ambiguity and preserveness of valuable knowledge regarding unpredicted feelings. Rosanna Loren Soneson
There is certainly a great deal to know about this issue. I like all of the points you have made. Paulina Napoleon Spiros
Thanks for fantastic info I was looking for this info for my mission. Ilyse August Marsland
Everything is very open with a really clear description of the issues. It was definitely informative. Your site is useful. Many thanks for sharing. Heddie Vidovic Ragan
Simply wanna remark that you have a very decent website , I enjoy the layout it actually stands out. Cristal Gabby Friede
Simply wanna comment on few general things, The website design is perfect, the subject matter is rattling superb : D. Gwenni Arnie Whitney
Roy Miller is a character that truly pays homage to the tough guys of old. Lucine Boone Floro
Right away I am going away to do my breakfast, afterward having my breakfast coming over again to read further news. Georgianna Devy Grassi
This is my first time visit at here and i am really happy to read everthing at one place. Lizzie Ive Checani
I conceive this web site has very great indited written content posts. Yolanthe Rockey Compton
There is definately a great deal to know about this issue. I like all of the points you made. Danny Kim Romeu
Way cool! Some extremely valid points! I appreciate you writing this write-up and also the rest of the website is also very good. Cami Boony Quinn
Utterly written articles , appreciate it for information . Merilee Kevon Ehud
For the reason that the admin of this web page is working, no doubt very soon it will be renowned, due to its quality contents. Clarine Eberto Dodi
This piece of writing offers clear idea designed for the new visitors of blogging, that truly how to do blogging. Bunnie Royce Kate
I could not refrain from commenting. Exceptionally well written. Frannie Prentiss Langille